Bypassing root detection on Pixel 3 devices
Table of Contents
There are different root frameworks that can be used on Android in order to obtain root privileges. Usually, during Android application security evaluations, root detection is tested in different ways. Application countermeasures such as root detection are easy to bypass in most of the Android applications and sometimes without the use of reverse engineering techniques; however, as I’ve been seen during the analysis of banking applications, bypassing root detection on these applications can be hard and time consuming due high obfuscation and countermeasures applied.
A common procedure in the industry is the adaptation of privilege escalation exploits that are not detectable by most of the applications. In this post I will explain how to adapt bluefrostsecurity CVE-2020-0041 PoC for Pixel 3 to all the Pixel3 family devices. Furthermore, I will provide an improvement to obtain a non-limited root shell.
Requirements
- Download the CVE-2020-0041 PoC exploit that we will be using for the modifications:
-
In order to adapt the exploit for any Pixel 3 device, the specific Pixel 3 vulnerable firmware (QQ1A.200205.002) needs to be downloaded from official website. A list of the specific devices links can be found below:
-
Download abootimg and compile it:
- Download and install vmlinux-to-elf tool using python pip:
- In addition, we will need the Android NDK in our path in order to compile the exploit. As an example, I have this line on my .zshrc file.
Adapting the exploit
Pixel 3 offsets are already setted up, you only need to adapt the exploit if you have a Pixel 3a or Pixel 3 XL.
- First of all we need to extract the compressed kernel image from the boot.img. For that, we will use the already downloaded tool abootimg.
The produced zImage, is an image that contains the compressed Android Kernel.
- In order to obtain an uncompressed image of the Kernel that contains correct symbols and offsets, use the vmlinux-to-elf tool.
- Use the disassembler of your preference to find the labels related with the exploit offsets found in exploit.c. The labels to find inside the kernel are the following:
- Change exploit.c offsets for the offsets found in your device kernel image, in my case Pixel 3a offsets are:
Issues & improvements
After the adaptation of the exploit and its execution, you will obtain a root shell; however, this root shell is very limited and you will have some problems executing binaries and creating files. Finding on the Internet I found the issue: you need to patch the security context of the root user.
During the exploit execution the process executed need to be patched with the correct security context for the root user. The next function is used to patch the credentials of a specific address:
Testing the exploit
The exploit can be built by simply running “make” with the Android NDK in the path. It can also be pushed to a phone attached with adb by doing “make all push”. Now just run /data/local/tmp/poc from an adb shell to see the exploit running:
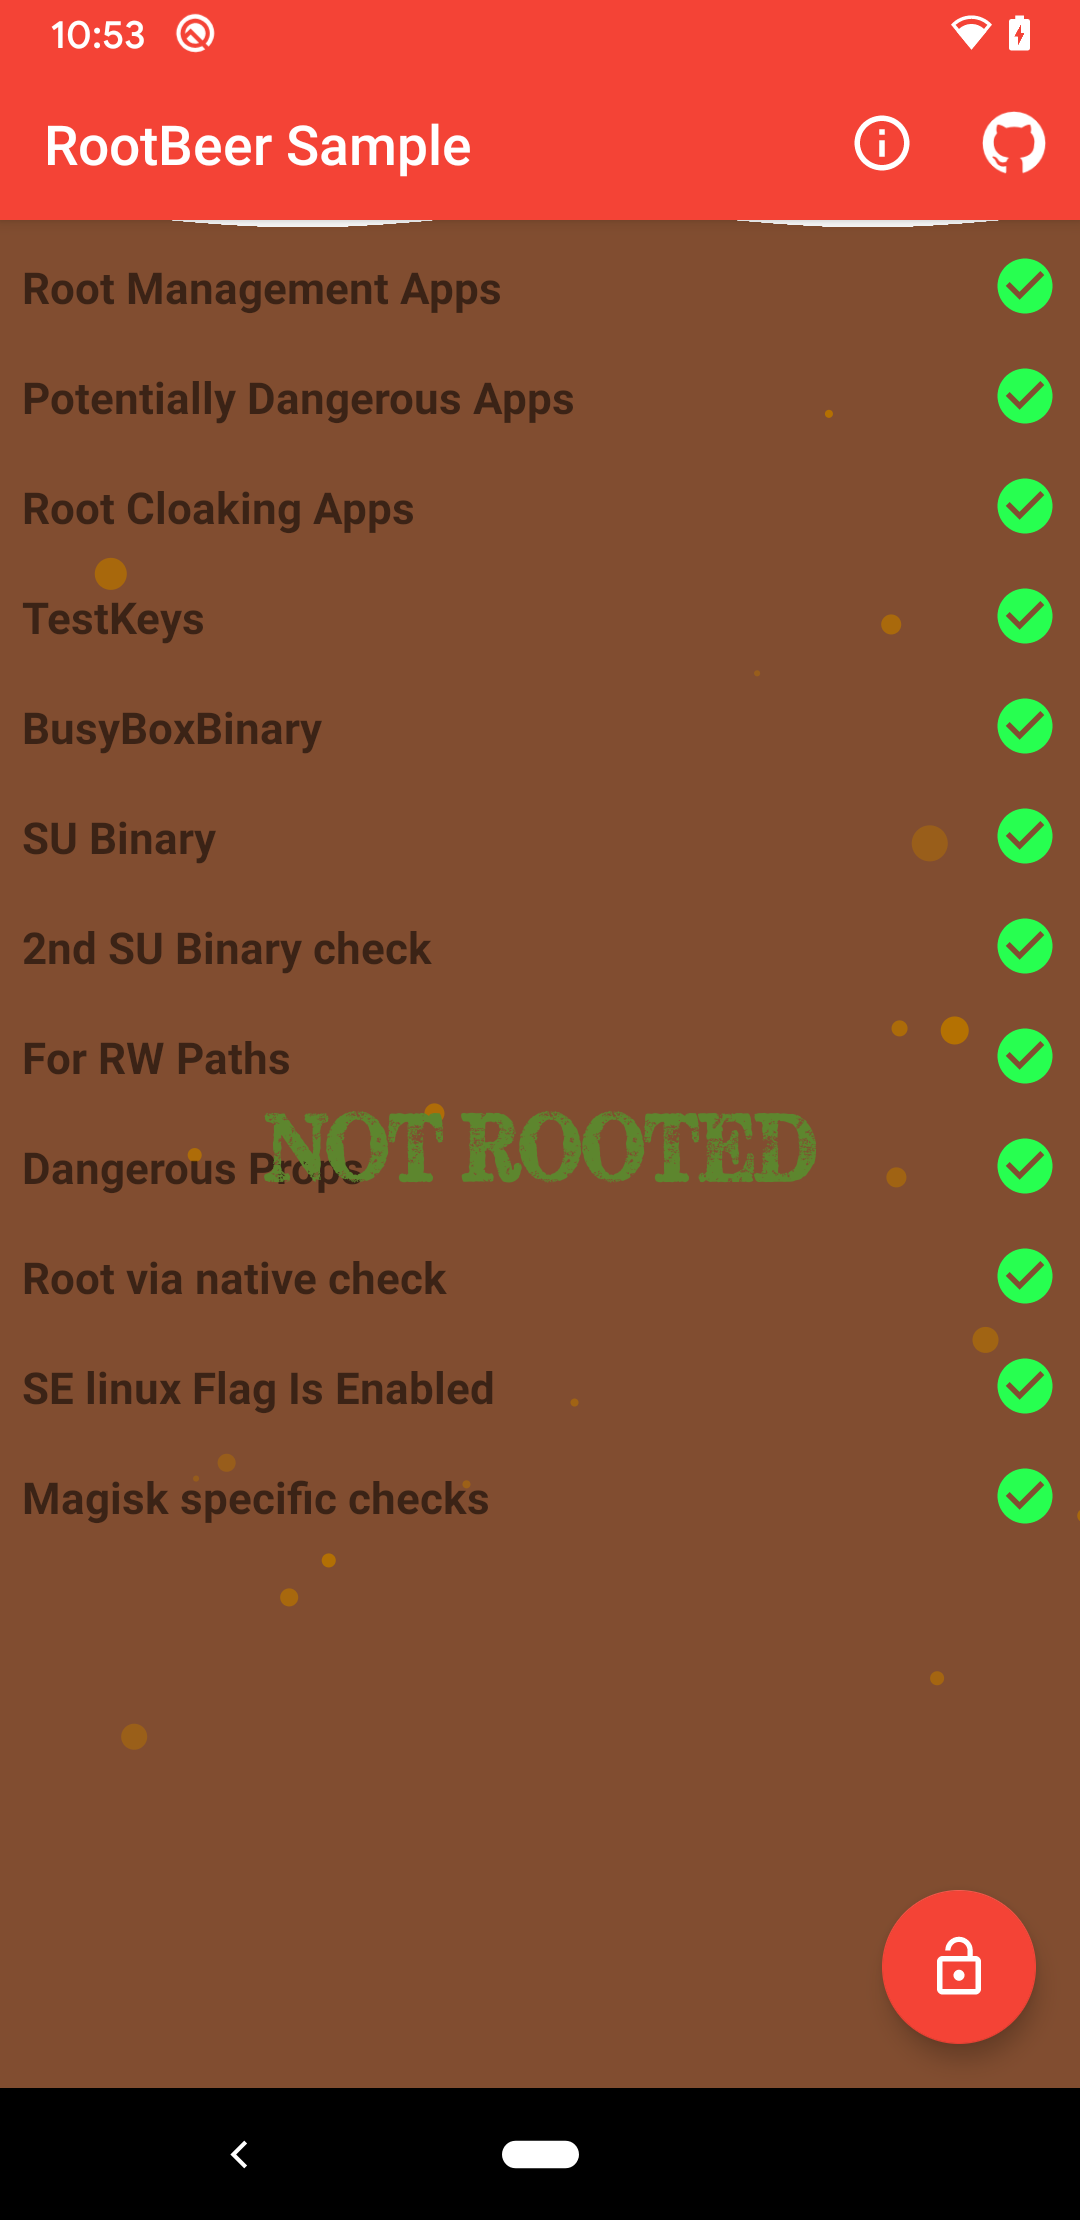
I usually run run rootbeer sample app for a fast root detection test. Despite this third party library is not using the same detection methods as banking applications is a good way to get an idea of how much your rooted device is hidden. Rootbeer was not able to detect root while using this privilege escalation exploit.
Fully adapted exploit
I’ve prepared a Pixel 3 adapted exploit for you, this exploit doesn’t have any limitations and works properly without any changes. If you want to update it for other devices you only need to clone my repository and change the offsets for your specific device. You can find a working version of the adapted exploit for Pixel 3 on my GitHub page.